I certainly am no Martha Stewart....everything I make is a fly by the seat of your pants creation/concoction in my head that is inspired by some random thing. Most of the time it works (and sometimes it doesn't.) But I love the process...and I really love the sweet vintage style flag banners you see lately.
Couldn't resist making one myself. Ofcourse, I wanted mine to look a bit more rich than the ones you see in the stores. So, off I went searching for all of my scrap materials and there I went to work on a "Merry Christmas" flag banner. The only thing missing here is a whistle for each flag....I used most of what I could think of for this piece. I am lucky to have a TON of miscellaneous materials lying around the house which I have collected throughout the years BUT, you can make this with anything, really. Be creative....that's what makes yours special. You can make a banner for any holiday, birthday, occasions...you name it.
This cost me $0.00:
Cut out your "flags" and letters using heavy duty paper...
Next, cut out newspaper "flags" a smidge smaller than your paper flags and glue to your original flags.
I then used a polycrylic finish to give it a sturdy surface...
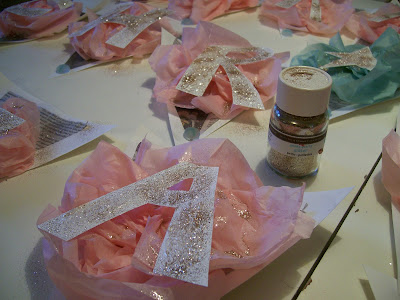
I have a habit of saving wrapping paper, boxes, tissue...you name it. I happen to have a load of pink tissue paper at my finger tips. I used some scraps for each flag and created a round "flower" if you will for the base of the letter.
I love Martha's craft supplies in general...however not so much her glue. It is designed as a throw back to our kindergarten years when you pulled out a brush with the cap (remember that??)
Quite messy....but I used it anyway.
Used a hot glue gun for the letters and to glue on the tissue paper a bit more
Happened to have these fun little stones and glued one to the bottom of each flag to give character
Using Martha's glue and glitter...I went to town with gold and silver....
Wanted my banner to have more depth and richness so I hot glued wraphia ribbon to the back of each flag...draping down from behind which gives whimsy.
In process...
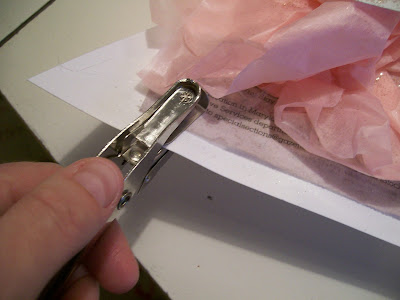
Punch holed two holes in each flag and chose a lovely satin cream wribbon to weave through the banner to add character...
I also sprayed some acrylic coating on each flag just to secure the glitter
done
It's a smidge on the pink side for my taste so I might give it a quick silver/gold spray paint...BUT, it will be lovely with all of our vintage Christmas decor I will put out soon.......how I do love CHRISTMAS :)


Love it! And I love that you showed how to make it... might need to pull out my old scraps!
ReplyDelete